
Medit iE and lab order forms: agree on the prescription before scanning
Set up your receiving laboratory before the first Medit iE case. Agree on the order choices the lab expects, then test the prescription and scan together.
Considering Medit iE?
Choose your configuration and request a quote from Dentcore.
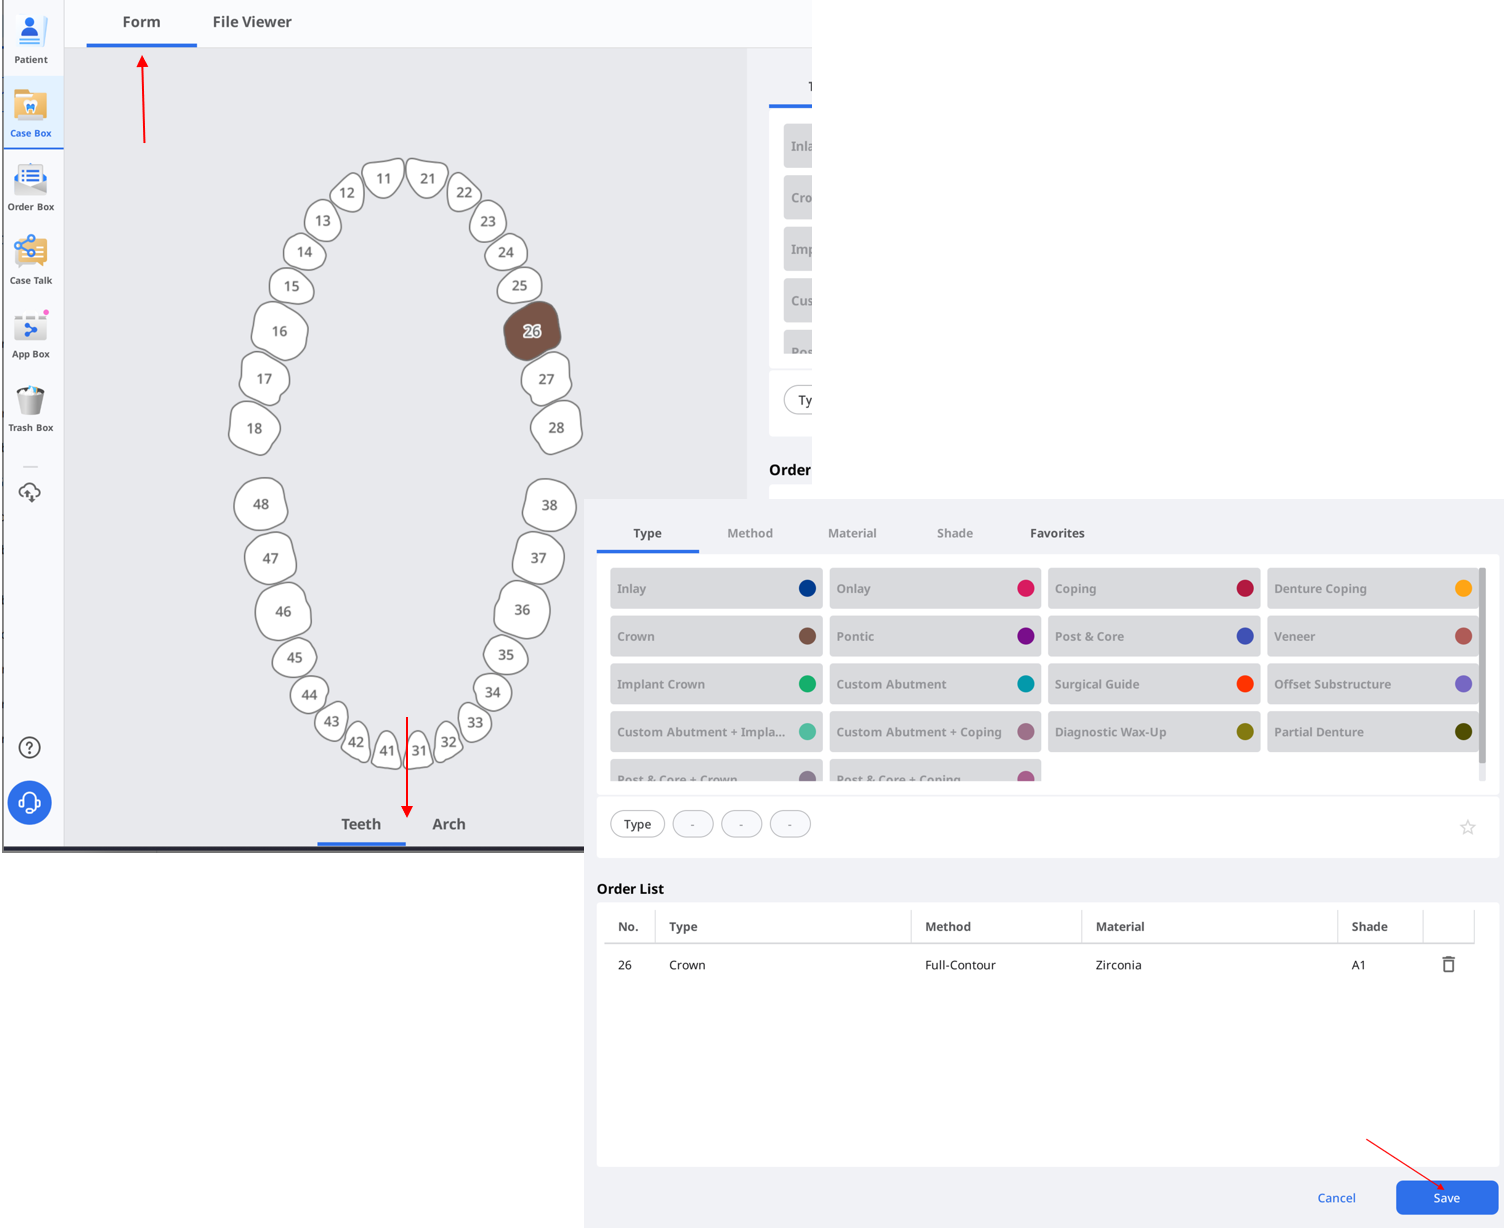
Medit's September 30 Link 3.5.0 release introduced lab-defined order forms. A laboratory can configure its treatment choices; when a clinic selects that partner, the clinic uses the lab's available options. For an iE buyer, this is a useful point to include in onboarding.
Start with the lab's actual prescription
Medit's updated Form Information guide identifies participating partners with the label "Uses Lab Form." Select the intended partner, complete the Form tab and save the case information. The form includes treatment type, method, material and shade.
We recommend agreeing on a representative order with the lab before training. Choose a case type your practice regularly sends and ask the technician to describe the exact selections they expect to receive. If your practice uses a familiar shorthand for a material, check which option corresponds to it in the form. A name that looks close is a poor basis for a clinical prescription.
Before the scan
Confirm the receiving lab and the intended prescription.
Before the order
Review the saved form alongside the completed scan.
Resolve a missing option before sending
If the requested material or treatment is unavailable in the form, ask the lab how that case should be submitted. Avoid choosing an unrelated option just to complete the screen. Keep the clarification with the case through your practice's approved communication process so another team member can understand the decision.
For practices that work with more than one laboratory, run this exercise separately for each partner. Do not assume the same visible label means the same laboratory service. The point of the test is to confirm agreement between the prescription you send and the work the lab expects to perform.
Make the first handoff a two-sided check
Use a training case without patient identifiers. Have one team member create and review the order while a second follows the handoff instructions. Ask the lab to confirm that the intended files arrived and that the prescription is understandable. Record any missing attachment or ambiguous selection in the training checklist.
Assign someone to review that checklist when the practice changes laboratories or adds a new treatment workflow. This keeps scanner training connected to the work your team actually sends, rather than stopping at a successful scan on the screen.
What to bring to an iE consultation
Bring the name of your receiving lab, the case types you plan to scan and any required prescription attachments. We recommend making the lab handoff part of your purchase discussion so the workstation and training plan support the same workflow.
For the broader installation sequence, read our Medit iE setup and first-case guide. For the scanner itself, see the iE specifications and workflow overview.
Build your Medit iE configuration
Tell Dentcore about your computer, scanning workflow and receiving lab. Review the configuration and request your quote.
Manufacturer reference: Medit Form Information (September 30, 2026) and Medit Link 3.5.0 release notes (September 30, 2026). Reviewed October 1, 2026. Planning recommendations are Dentcore's editorial guidance.
Product information, prices and terms are subject to change. Dentcore may correct errors and clarify offer terms. Confirm current configuration, availability and details before ordering. Follow the manufacturer's current instructions for use.